Simple Vegetation
Ok let’s place some vegetation, a jungle isn’t a jungle without it.
First thing to do is load some vegetation groups that we can use to place in the level.
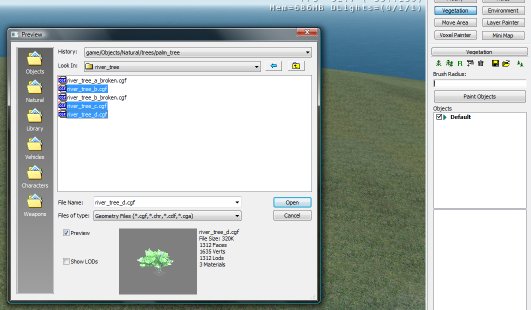
On the rollup bar, go to the vegetation button. This is where we’ll be placing trees and plants from. First thing however, is to load up some vegetation types. To do this, simply click on the little tree icon on the left side of vegetation browser.
You can load anything you want, but for the sake of argument let’s load some palm trees, some bushier river trees and some grass.
In the tutorial I’m using
-Objects/natural/ground_plants/grass/bigpatch_medium.cgf
-Objects/natural/trees/river_tree/
-Objects/natural/trees/palm_trees/
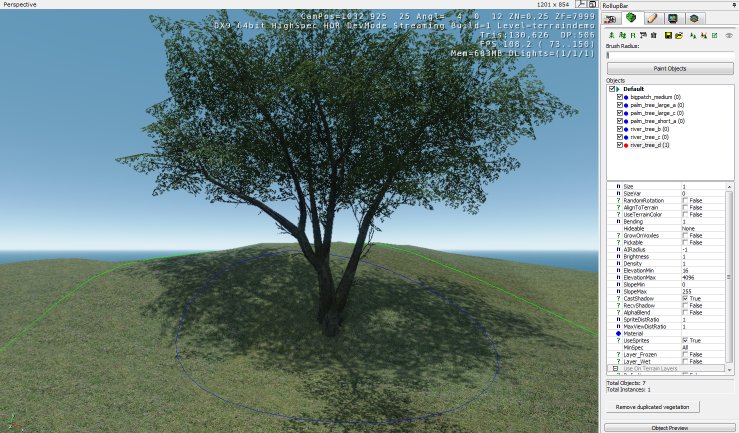
You can see the tree types I loaded in the screenshot
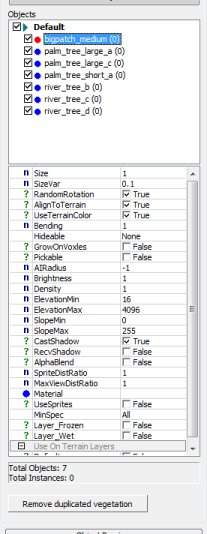
Ok now that we have some trees loaded into the vegetation browser, it’s time to set them up. Before we place anything, we need to change the properties of the objects. Click on the grass listed in the vegetation browser.
We want to change the following properties for all the vegetation loaded:
-Size var should be changed to 0.1 or 0.25 to give a variation to the vegetation
-Random rotation should be checked
-Align to terrain should be checked
-Use terrain color should be checked
-Cast shadow should be checked
-Use sprites should be unchecked (for grass only!)
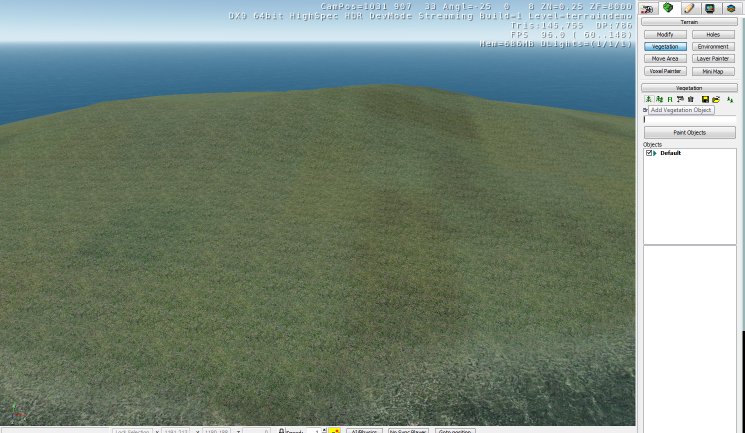
Now we can start placing them
Make sure Snap to Terrain is selected on the top toolbar. This will make adjusting the position of the vegetation much simpler. Snap to terrain is the little green thing with the wavy line over it.
Now, select one of your trees. While HOLDING shift, left click on the terrain. You selected vegetation should appear. By left clicking and holding LMB at the base of the tree you can drag it around (as long as snap to terrain is on!). You can hold shift and place as many as you like.
By holding CTRL and ALT you can rotate the tree to make it appear more random.
Let’s place a few
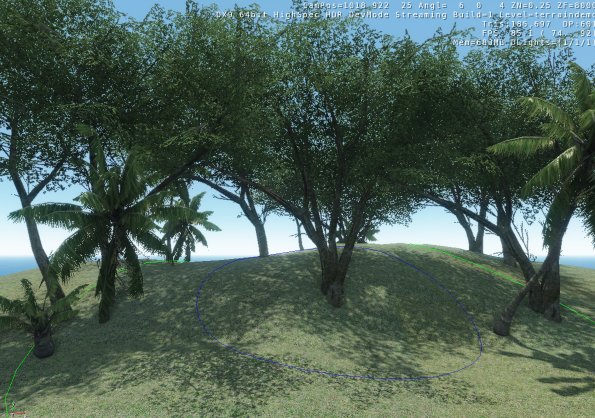
Now let’s add some grass, do this in the same way as you placed the trees. Try not to overlap these patches too much, they’re quite large. They can often be a little tricky to select too, you have make sure you’re clicking in the middle of the patch.

That’s basically it for simple vegetation placement. Later on I’ll try to cover vegetation painting, and auto-placement of vegetation through the detail texture layer.
One final thing to do, File -> Generate surface textures, but this time we’re going to change the settings.
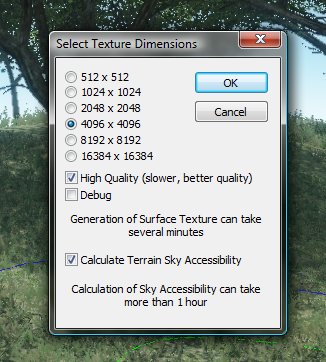
Click on high-quality and Calculate Terrain Sky Accessibility. Essentially these will darken the ground around the trees and add some nice additional depth to the scene.
Be warned, it might take a few minutes to calculate.
You can see the effects below
